Today, I’d like to tell you about a new community-contributed integration that connects Honeycomb to your ServiceNow workflows. My new integration reimagines what’s possible when connecting observability tools with ITSM systems. This post explains how it works and how to get started with it.
About my ServiceNow integration with Honeycomb
Although I work for Honeycomb, this is a personal project I developed because I want to show people what’s possible when connecting with ITSM workflows.
Maybe you use Honeycomb already; maybe you’re just trying it out right now and thinking about taking the plunge. Your organization might have already been using ServiceNow for years, or it could be relatively new to you. I think one thing is for sure: monitoring, APM, and observability tools have a long history of weak and inconsistent integrations with ServiceNow. I set out to change that. One of my guiding principles in this process is that this integration has to be actionable. This is a direct reflection of the mentality at Honeycomb, and I feel like I’ve successfully accomplished that here.
I’m thrilled to share my new integration with you. I think it’s more powerful than any other ServiceNow integration I’ve seen—and it’s definitely easier to set up. It helps you unlock more value from both tools and introduces new incredibly efficient workflows. Read on, because I can’t wait for you to try it.
How it works
My new Honeycomb-ServiceNow integration allows you to:
Create or update configuration items
With this integration, you’ll be able to create or update configuration items in your ServiceNow CMDB for entities that have recent data in Honeycomb. That includes application/parent services and underlying applications today (and I’m planning to add more types of entities soon).

Create rich Service Maps
You’ll also leverage the ability to create rich Service Maps in ServiceNow for the systems you’re observing in Honeycomb. These maps are based on real traffic between CIs and are periodically updated based on the latest telemetry data.

Observe the impacts of Change Requests directly in Honeycomb
For change requests logged in ServiceNow against entities being observed in Honeycomb, you can automatically launch straight into Honeycomb in the right context to see service performance for the change-affected resources: both before and after the change was implemented. The “Open in Honeycomb” button allows you to validate if the service has any negative impacts from the change in real-time.

Create rich Incidents or Events in ServiceNow for Honeycomb Triggers and Honeycomb SLOs
You can add your ServiceNow instance as a recipient on any Trigger or SLO burn alert, and Incidents or Events will be created when the specified conditions are met. ServiceNow Incidents or Events will be automatically updated if the trigger condition in Honeycomb is no longer met or if the SLO burn alert status changes to green. When used in this setting, the “Open in Honeycomb” button opens these in context for rapid troubleshooting.

Open any Incident or Alert directly in Honeycomb that is affecting an entity you are observing
Go straight to the affected resources during the right time frame, and jumpstart your troubleshooting process.

Who this integration is for
My hope for this integration is that anyone and everyone can benefit from it. But, it does leverage features in Honeycomb and ServiceNow that require certain paid features. In order to use this, you’ll need the following requirements:
- A Honeycomb Enterprise subscription
- A ServiceNow Flow Designer subscription that allows REST calls to external endpoints
If you have those two things, you’re all set! You don’t need to deploy any additional agents, further scale your ServiceNow deployment, or any additional subscriptions. Most notably:
- No ServiceNow MID Server is required
- No ServiceNow ITOM subscription is required
How to get started
The process of setting up my integration is as easy as it gets. First, install the integration and add one or more API keys for your environments. Then, attach your ServiceNow instance as a recipient for any Honeycomb Triggers and/or Honeycomb SLOs that you want to send Incidents to ServiceNow.
Here’s a detailed step-by-step tutorial on how to do that:
Step 1
Download the update set to your local drive.
Step 2
Import, preview, and commit the update set in ServiceNow.
a) In ServiceNow, navigate to “Retrieved Update Sets,” scroll to the bottom of the window, and click “Import Update Set from XML.” Select the update set you downloaded.

b) Locate the update set in the window you are redirected to and open it.
c) Click “Preview Update Set” on the top right of the window.

d) If there are any warnings or errors, scroll down and locate the relevant tab. Select all warnings or errors, and choose “Accept Remote Update.”
e) Click “Commit Update Set” on the top right of the window.
Step 3
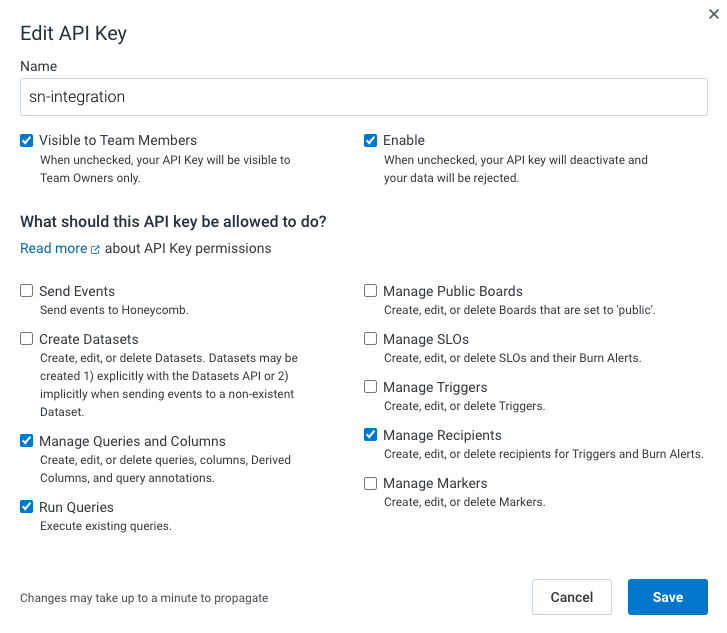
If you don’t have an API key yet, you’ll need to create one for each Honeycomb environment that you want to integrate with ServiceNow. For each API key, please ensure it has the following permissions in Honeycomb: “Manage Queries and Columns,” “Run Queries,” and “Manage Recipients.”
Step 4
Input the API key into ServiceNow for each environment you want to integrate.
a) Navigate to Honeycomb Integration -> “Honeycomb Environments.” Click “New” at the top right.

b) Click the magnifying glass next to the field “API Key.”
c) If the relevant Honeycomb API Key has already been created as a record in ServiceNow, select it from the list. Otherwise, click “New” at the top right of the window listing API Keys.
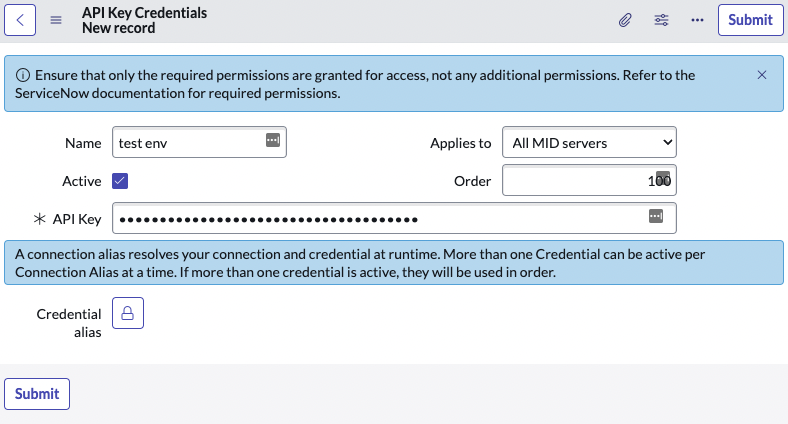
e) If you don’t want to import observed entities from Honeycomb into your ServiceNow CMDB, uncheck “Populate CMDB from Honeycomb.”
f) Click “Submit” on the Honeycomb Environment record.
Step 5
Add your ServiceNow instance as a recipient for alerts on SLOs and/or Triggers in Honeycomb.
a) In Honeycomb, on any Trigger or SLO, you now have the option of adding your ServiceNow instance as a recipient.
1- To send the SLO Burn Alert or Trigger Alert to ServiceNow as an event (em_event table), use the recipient called “ServiceNow Event.”
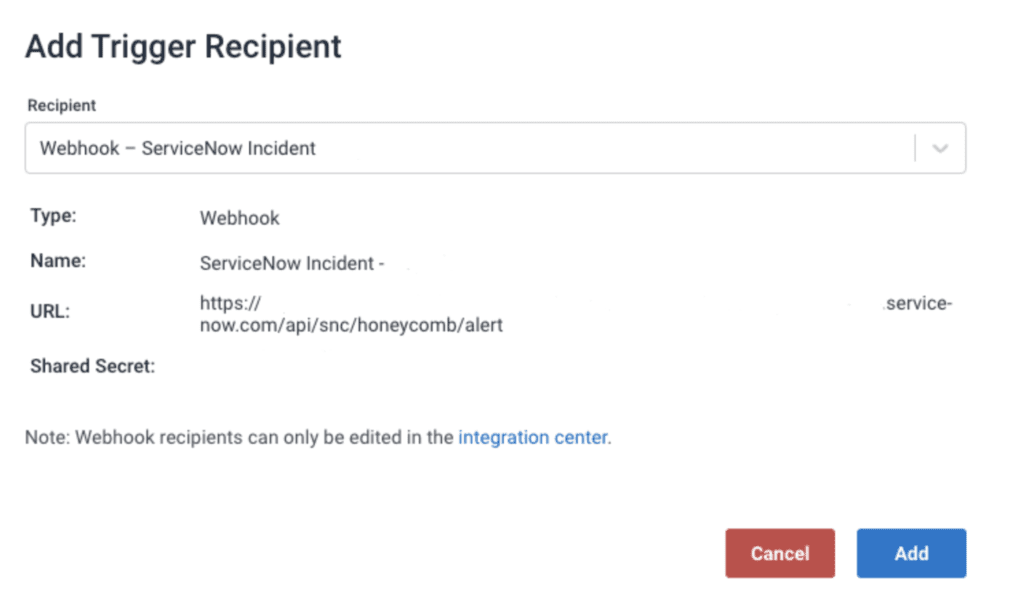
2- To send the SLO Burn Alert or Trigger Alert to ServiceNow as an incident (incident table), use the recipient called “ServiceNow Incident.”

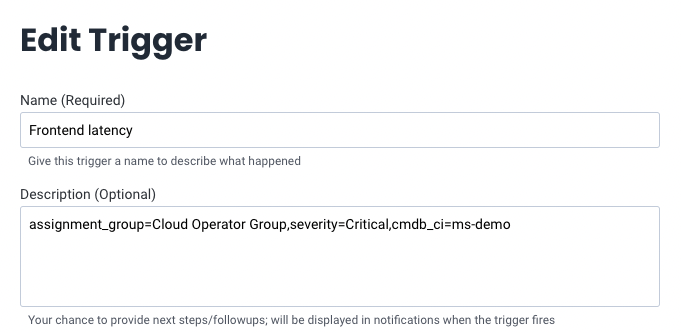
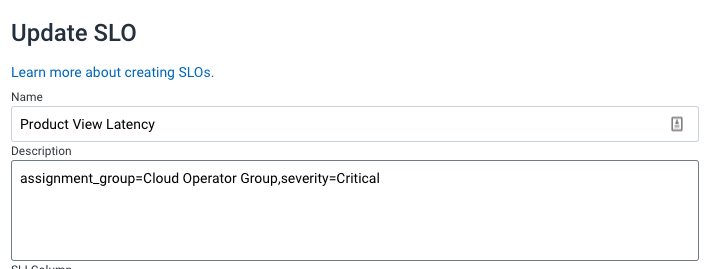
b) If you want to send custom attributes with the webhook, format them as comma-separated, key-value pairs in the description of the Trigger or SLO definition. If you pass in assignment_group, cmdb_ci, or severity as below, they will be automatically handled as such in ServiceNow on the resulting SN Alert or Incident (and will override the CI that would have automatically bound if you imported CIs into your CMDB from Honeycomb).
Step 6
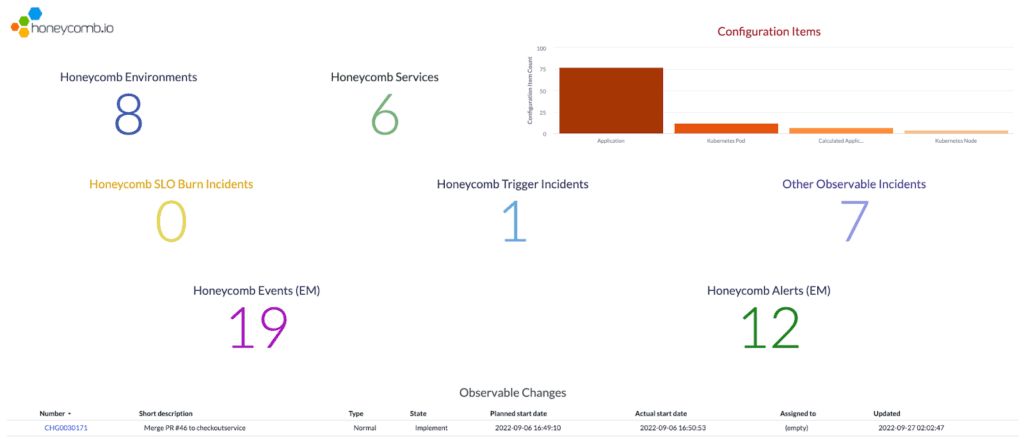
Review results.
a) Type “Honeycomb” into the filter navigator.
b) Click “Dashboard.”
Try it today
This new Honeycomb-ServiceNow integration is my own personal project and a community contribution. I’m a part of the Pollinators community and I’m thrilled to be able to share this experiment with you. My hope is that you find it useful in your workflows and that, together, we can figure out how to make it even more useful.
Let me know what you think. Feel free to hit me with questions, comments, or any issues you run into. You can reach me on Pollinators or you can shoot me an email directly.
Cheers!
Matt


